 Skip to content


How to Fix Loose Tiled or Hollow Floors
Hollow-sounding tiles? Loose flooring underfoot? Worried about the cost? Before you start ripping up your floor and emptying your savings account, there’s a much simpler fix. Our Fix-A-Floor formulation is a specialist hollow tile repair adhesive that lets you repair hollow tile floors and loose tiles quickly, affordably and without replacing the whole tile or floor.
We’ve put together this easy-to-follow guide on how to fix hollow tiles and solve your flooring issues with total confidence, and we’ll address any common questions as we go. Firstly, here’s what you’ll need:
Materials Required:
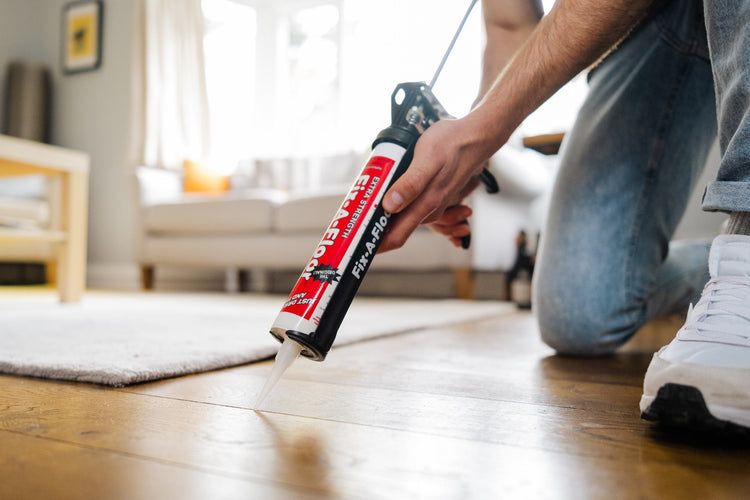
- Fix-A-Floor Extra Adhesive: Our specially formulated, award-winning loose tile solution.
- Caulking Gun: Load our adhesive tubes into our caulking gun for super-easy application.
-
Drill and drill bits: For creating pilot holes in your grout at the ideal size
- Vacuum or dustpan: To clean up any residual dust from the drilled holes
- Damp sponge: For wiping away any excess adhesive around the grout holes
- Heavy items: Such as buckets filled with water, to place on the area while the adhesive cures
-
Matching grout: For a professional finish over the grout holes, once your floor is fixed

What is Fix-A-Floor extra-strength hollow tile repair adhesive?
Fix-A-Floor is a specially formulated, extra-strength DIY bonding adhesive used to fix hollow tiles, loose flooring and creaky wood and laminate boards without removing or replacing a thing. It’s low-viscosity, easy to apply and cures with flexible, long-lasting strength.
Whether you’re dealing with ceramic, stone, porcelain or even underfloor heating, our adhesive delivers a permanent fix for under tile voids. We make it easy to fix your loose flooring issues with everything you need for a professional-looking result, including a selection of our tile repair kits, which contain all the essential tools for a smooth, stress-free repair.
How to repair hollow tiles
Ready to discover the ease of DIY tile repair and remove under tile voids that cause those annoying creaking noises and looseness underfoot? It’s easier than you think. Let’s walk through the process:
1. Prepare the hollow tile repair adhesive
Before you start fixing those hollow tiles, get your Fix-A-Floor adhesive ready by trimming the tip to fit your grout width and loading it into the caulking gun.
- Remove the cap from the tip of the adhesive tube
- Carefully cut the plastic tip with a Stanley knife or scissors along the groove lines. Each groove matches a different drill bit size
- For narrower grout widths, you can poke a small hole through the tip or trim just the end
- Screw the cap back onto the tip of the tube until you’re ready to apply
- Insert a Fix-A-Floor tube into the caulking gun
Top tips: Keep the tube upright until ready to use and place a finger over the tip when moving between holes to prevent spillage. You can also collect the dust and reuse it to fill the pilot holes, saving time mixing up a grout to match.
2. Drill and inject Fix-A-Floor adhesive into under tile voids
Once the adhesive is ready, it’s time to locate your loose tiles and inject Fix-A-Floor loose tile solution using these simple steps.
- Locate hollow areas under tiles and flooring by tapping with a wooden dowel or your fingers
- Drill two to four holes on each side of each loose tile using a masonry drill bit
- Vacuum over each hole to remove debris and dust, or clean with a dustpan and brush
- Grab the caulking gun, remove the cap and fill holes as needed, ensuring the adhesive flows consistently. For the best results, apply slow, gentle pressure on the caulking gun handle, waiting around 10 seconds between each squeeze, due to the adhesive’s low viscosity
- Once the hollow area has been filled, wipe away any excess adhesive from the area
- Allow the adhesive to cure for a minimum of 24 hours
- For a seamless finish, fill the drilled holes with matching grout

Our top tips on how to fix hollow tiles
Whenever using Fix-A-Floor for floor tile reattachment, always allow the adhesive to cure for the full 24 hours and place a weighted object over the area being fixed. This will assist in creating a strong bond between the tile and subfloor. Filled buckets of water work well. You may have to apply more adhesive after the curing period to properly fill the hollow area. If your tiles are still showing signs of looseness, simply repeat these steps.
Fix-A-Floor adhesive: the easy-to-use loose tile solution
With Fix-A-Floor, you’ve got a cost-effective, no-stress solution for DIY tile repair that doesn’t involve removing or replacing your floor. Our simple steps, including our video guides, walk you through the process, helping you fix hollow tiles and creaky floorboards with lasting, professional-looking results.
All it takes is a bit of prep, a little patience and the right tools for the job – we provide everything else you need. Follow our simple floor tile reattachment process and your floor will be solid, secure and as good as new – and all without the mess, expense or disruption of a full relaying.
Next time someone asks for the best loose tile solution, you’ll know exactly what to say: fix it fast with Fix-A-Floor!

Conclusion
With Fix-A-Floor adhesive, you have an affordable and user-friendly solution for fixing hollow floor tiles. By following our guide, you’ll have a seamless and successful repair process, offering an affordable alternative to replacement. Your floors will be as good as new in no time, and when someone asks how to fix hollow tiles, you’ll tell them – with the Fix-A-Floor adhesive!
Fix-A-Floor adhesive and how to fix hollow tiles | FAQs
What causes hollow sounds under floor tiles?
These hollow sounds and creaks are usually caused by air pockets and gaps between the floor and the supporting subfloor. This can happen after poor installation, but also due to crumbling adhesive, natural wear and tear and floor movement over time. These under tile voids can lead to loose tiles, creaking and even cracking if left unrepaired.
Can I use Fix-A-Floor on underfloor heating?
Yes, our hollow tile repair adhesive is safe for use over underfloor heating systems. Just be careful when drilling – we recommend marking your drill bit to the tile depth with something like masking tape – and avoid drilling any deeper than this. The adhesive works well with heat, curing to a flexible bond that moves with temperature changes.
We recommend switching off underfloor heating at least 24 hours before using Fix-A-Floor, and keeping it off for a little longer after application to allow the adhesive to cure properly.
How long does Fix-A-Floor take to cure?
The adhesive requires a full 24 hours to cure. During this time, you should place a weighted object over the area to ensure strong floor tile reattachment. After curing, you can grout over the holes and walk on the surface as normal.
Do I need to remove tiles to use Fix-A-Floor
No, we developed Fix-A-Floor hollow tile repair adhesive to specifically avoid this situation. Instead, you simply drill into the grout and inject the adhesive into the underlying voids. It removes the need for expensive tile removal or replacement, making it ideal for DIY tile repair.
Is Fix-A-Floor suitable for outdoor tile repairs?
Fix-A-Floor is designed primarily for indoor use. It can be used in small outdoor covered areas, but only if the space is fully water-sealed and not exposed to rain or excessive moisture.